Friday, February 14, 2014

MAPLE CANDIED BACON !!

Now I know that bacon isn't on a lot of our low calorie diets, but once in a while, you just have to live a little!!

I've seen candied bacon recipes all over the Internet and often wondered what all the fuss was about, after all, what can be better than fried bacon? Well, I'm here to tell you that CANDIED BACON is the answer. Holy cow, this stuff is good!!


Some people are dicing it and putting it on top of maple frosted cupcakes, some people are dicing it and putting it into deviled eggs, and some people like me who shall remain nameless, just devour it right out of the warm pan!!  It's just THAT good!!

 
There's not much of a recipe, but there ARE several tips I can give you that will help a bit.
 
First of all, use a large cookie sheet that has a lip on it. Line it with foil (this will make clean up a breeze) and put an oven safe wire rack on the foil (make sure to spray both sides of the baking rack with cooking spray too...that will also help).
 
 
Now a word about which bacon to use. Quality thick sliced smoked bacon works best, but it takes a lot longer to cook. Regular thickness smoked bacon works well but you REALLY have to watch it like crazy so it doesn't burn.......it's your choice.  I think I like the thicker bacon better; I have had great success using apple wood smoked bacon.
 
Preheat your oven to 400° if you are using thick bacon and 375° if you are using regular thickness.
 
Mix 1/2 cup of REAL maple syrup and 1 teaspoon Dijon mustard. Place the raw bacon slices on the baking rack, making sure that the slices don't overlap. Baste the raw bacon liberally (on one side) with the syrup-mustard mixture. 
 
Bake thick bacon for 20 minutes and regular sliced bacon for 15 minutes. Remove from oven, flip the bacon over and baste the other side with the syrup-mustard mixture. Put back in oven and bake the thick slices for another 20 minutes and the regular slices for another 10 minutes.
 
CAUTION: If you use the regular sliced bacon, watch it very carefully the last few minutes, because it can burn quickly if you leave it in too long.
 
 
When you take it out of the oven (the last time), sprinkle it very lightly with black pepper and TAKE IT OFF OF THE BAKING RACK.
 
I cool mine on parchment paper for about 15 minutes; unless I'm eating it right away I turn it over to make sure it cools/dries evenly.
 
NOTE: When I am out of REAL maple syrup, I've tried this recipe using pancake syrup. It works ok too, but it burns easier and the real maple syrup tastes a LOT better.
 
ENJOY !!

Tuesday, February 11, 2014

APPLE PIE CHEESECAKE FOR TWO

This is a wonderful (and super easy) dessert to top off that romantic Valentine dinner for two (and you can make it all ahead of time!!).  It is a creamy cheesecake, topped with a warm apple pie filling and cold whipped cream........best of the best!!


Preheat your oven to 325°F, and line a mini-loaf pan (6"x3"x2") with foil, then lightly spray the foil with cooking spray.

CRUST
1/4  cup graham cracker crumbs
2    teaspoons sugar
2    teaspoons melted butter
1    tablespoon chopped pecans
pinch of cinnamon

Mix well and press into the bottom of your prepared mini-loaf pan.

CHEESECAKE FILLING
4 ounces cream cheese at room temperature
3 tablespoons sugar
1/2 teaspoon vanilla extract
2 teaspoons flour
1 large egg white

Beat the cream cheese, sugar and vanilla until very smooth; mix in the flour and egg white and beat just until smooth (takes just a second).

Spread the filling, evenly, over the crumb crust. Set the mini loaf pan inside an 8" or 9" cake pan and fill the bigger pan with some HOT water (hot water should be about 1" deep). Bake 28-33 minutes (my electric oven takes exactly 33 minutes). The cheesecake should be just "set" and barely jiggle when you tap on the side of the loaf pan.

Remove from oven and let it sit at room temperature for about 30 minutes, then chill in the fridge for at least 2 or 3 hours (or overnight).

APPLE PIE TOPPING
This topping should be put on the cheesecake just before serving. You can serve it warm (which is how we like it) or cold.


2 large sweet apples (see note)
1 tablespoon butter
1 teaspoon water
1/2 cup sugar
1/4 cup brown sugar
1/4 cup chopped pecans
1/4 teaspoon cinnamon
pinch of nutmeg

Melt butter and water in a medium saucepan and then add everything else. Saute on low heat for about 5-8 minutes or until apples are tender. Thicken the sauce with a slurry of 1/2 teaspoon of cornstarch and 1 teaspoon of water.  Remove from heat and stir in 1/4 teaspoon of vanilla.

You can use this topping after it cools down a little, or if you want to serve it cold, just store it in the fridge.

When it's time to serve, grab the ends of the foil in the mini-loaf pan and lift the cheesecake out.  Cut the cheesecake in half and place on dessert dishes; top each one with a large serving of apple pie filling (warm or cold). Top with sweetened whipped cream.

Enjoy!!
 
 
NOTE: Use any good eating apple. If you use something really tart, like a Granny Smith apple, just add a little extra sugar.

Sunday, February 9, 2014

OLD FASHIONED LEMON BARS

I tried (yet another) one of Laura's great recipes over at  heywhatsfordinnermom.com  (she has some great ones over there). 

This recipe, for Old Fashioned Lemon bars, couldn't be more basic, yet it hits all the right "lip smacking" notes and picky-picky husband loved them, so that makes this recipe 5 stars at our house!!

 
 The lemon bars have a sweet and buttery shortbread type crust that is partially baked before a gooey topping is added and baked again. The topping is sweet-ish, lemony-ish, pudding-y-ish (are those even real words?) the combo is heavenly.

BASE LAYER
1 cup flour
1/2 cup powdered sugar
1/2 cup COLD butter cubed

Put these three ingredients in the food processor and pulse until you get crumbs.  Pat the crumbs into an 8" x 8" baking dish. Bake in preheated 350° oven for 20 minutes.

While it is baking, whisk together the following topping ingredients until very smooth:

TOPPING LAYER
2 eggs
1 cup sugar
zest of one lemon (see note)
2  1/2  tablespoons lemon juice
2  1/2  tablespoons flour
1/2 teaspoon baking powder

After the cookie base ingredients have baked for 20 minutes, remove from the oven and pour over the topping ingredients and put it right back in the oven for another 25 minutes.

Cool completely in pan before cutting.  Sprinkle with a little powdered sugar (if you want).  Cut into small squares or bars since it is pretty rich.

STORE COVERED
 
NOTE: Be careful to only use the bright yellow part of the lemon zest. They pale yellow and while part of the lemon peel is very bitter.

NOTE: I lined my baking pan with parchment paper and left the ends/edges a little long. After the bars completely cool, I grab the edges of the paper and lift the whole thing out of the pan. I do this with all of my bar cookies because once they are out of the pan they are so much easier to cut.

NOTE:  If you aren't going to line your pan with parchment paper, I suggest you very lightly mist it with cooking spray.


Tuesday, February 4, 2014

BEST EVER PIZZA SAUCE

My picky-picky husband has been my pizza sauce Guinea pig taste tester for 43 years (pizza is his all time favorite thing to eat). I have to admit that I fed him some pretty funky pizza's over the years....he has been a brave man.

Well, several years ago, I got serious about my goal (to re-create a pizzeria style pizza sauce) and started experimenting again (poor husband). Some were too garlic-y; some were too onion-y; some were too oregano-y; etc.  

After dozens and dozens and dozens of pizza's, I've finally come up with the perfect blend of spices. Picky-picky husband is really smiling and making lip smacking noises when he eats my pizza these days (insert my big grin here). I hope your family likes it too.

MUCH BETTER THAN
COMMERCIAL PIZZA SAUCE !!


(1) 6 ounce can of tomato paste
1  1/2 cans of water
1 teaspoon minced garlic
1 teaspoon brown sugar
1/2 teaspoon salt
scant 1/2 teaspoon onion powder
1 teaspoon dried oregano
1 teaspoon dried basil
1/2 teaspoon dried marjoram
1/4 teaspoon black pepper
1/2 teaspoon fennel seeds (don't leave out)
1/8 teaspoon red pepper flakes
1 tablespoon olive oil
~~~~~~~~~~~~~~~~~~~~~~~~~~~~~~
3 tablespoons Parmesan cheese  (add AFTER its cooked)

Whisk together and simmer the above ingredients (minus the cheese) for about 5 minutes (SLOW simmer). Remove from heat and stir in 3 tablespoons Parmesan cheese (I use the stuff in the green can).

That's it!!  It's good to go immediately or you can keep it in the fridge for up to 3-4 days. It really is wonderful.


Tuesday, January 28, 2014

FRUIT FILLED COOKIE BARS

I had a hard time coming up with a name for this delicious treat. It is not exactly a cake, but it's a little soft to be a cookie. It does remind me a little of one of those big soft cake-y sugar cookies, but don't forget it has a juicy fruit filling too, so what category does it really fall into?  Answer: Yummy Category!!


Usually, we just eat these out of hand, but they are also nice enough for company if you serve them with a scoop of ice cream!! Either way they are hard to beat with a tall glass of milk or a hot cup of tea.

1/2 cup butter (room temperature)
1 cup sugar
2 eggs
1 1/2 cups flour
1 teaspoon vanilla
14 ounce can fruit pie filling (see note)

Cream butter, sugar and vanilla together until very well mixed. Add the eggs, one at a time, beating well in between each egg.

Add flour and beat until well mixed, then let the dough sit for about 5 minutes.

Press 3/4 of the dough into a lightly greased 9" x 9" pan (I use a (9" springform pan).  Make the outside edge just a little deeper than the rest of the crust (this will help keep the fruit away from the edge of the pan).

Top with fruit filling (see note) and then drop little bits of the rest of the reserved dough on top of the fruit filling.

Bake in a pre-heated 375 oven for 35-40 minutes depending on how hot your oven runs. My electric oven takes 37 minutes.

Let cool for a while then drizzle with a vanilla frosting glaze.

Cool and store covered.


NOTES:

Any home made or commercial fruit filling will work well in the recipe, but I suggest that if you use a commercial pie filling, that you jazz it up a little. Example: if you are using cherry pie filling, add 1/4 teaspoon of almond extract, if you are using apple pie filling, chop them up a little and add a little more cinnamon and nutmeg or maybe a few raisin? Use your imagination.

You can double the ingredients and bake it in a 9" x 13" pan for 40-45 minutes.  Either way, use the toothpick test to make sure its done in the middle.


Friday, January 24, 2014

FRESH PINEAPPLE UPSIDE-DOWN CAKE

I'm not sure WHY I've never thought of making a pineapple upside-down cake with FRESH pineapple before. Maybe it is because ALL of my cookbooks suggest canned pineapple? Maybe it is because canned pineapple is always in the pantry? Maybe it is because I'm not very adventurous? Well, this cake came about due to the rare combination of... "I want to bake something" + "what can I do with this very ripe pineapple?" + "the perfect window of time". 

The end result was this pineapple upside-down cake made with FRESH pineapple and it was delicious!! The difference is like night and day!!


Preheat your oven to 350 and cut a parchment paper liner for the bottom of a 9" round cake pan. Spray the pan and parchment paper with a light coating of cooking spray. The parchment paper is not absolutely necessary, but it helps if you have a "sticking" issue with the sweet pineapple glaze (you can use waxed paper in a pinch).

5 tablespoons of melted butter
2/3 cup brown sugar (packed)
3 cups fresh pineapple cut into 1" cubes (see note)
maraschino cherries cut in half
1 1/2 cups all purpose flour
1 1/2 teaspoons baking powder
1/2 teaspoon salt
1/2 teaspoon cinnamon
1/2 cup butter (room temperature)
2/3 cup white sugar
2 eggs
3/4 cup pineapple juice (or milk)
1 teaspoon vanilla
1 teaspoon butter extract
1/2 cup pecans chopped medium-small

Mix melted butter with brown sugar and spread evenly in prepared 9" round cake pan. Set aside.

Cut pineapple into 1" chunks and blot them dry between several thicknesses of paper towel (press on them a little to extract excess juice).

For the batter, cream the butter and sugar until it is really fluffy. Under-beating the butter at this stage will give you a poor quality cake. When it is nice and fluffy, add the eggs (one at a time) and extracts and beat until its fluffy again.

Sift the flour, baking powder and cinnamon into a bowl. Add the flour mixture to the butter mixture in three parts, alternately with the pineapple juice (or milk) starting and ending with the flour. Set aside.

Assembly: Nestle the pineapple, pecans and cherry pieces down into the brown sugar mixture in the cake pan (arrange in pretty fashion because this will show). Pour the cake batter over the top and very gently spread it out.

Bake in 350 oven for 45 to 55 minutes or until a toothpick tests clean (my oven takes exactly 45 minutes). Remove from oven and sit pan on a cooling rack for 15 minutes. After 15 minutes, run a thin bladed knife around the edge of the cake and invert onto a serving plate and peel off the parchment paper. Serve cake warm or at room temperature.

NOTE: Traditionally, pineapple upside-down cake has pretty rings of pineapple with red cherries in the center of each ring. However, when the cake is baked like that, it is hard to eat. You either get a big unmanageable hunk of pineapple on your piece of cake or no pineapple at all (does that make sense?). Instead, I cut the pineapple into very small pieces (almost a dice) and arrange the cherries randomly over the cake. It is much easier to cut, serve and eat (even if it ISN'T traditional). If you use this diced pineapple style, it only takes two cups of diced fruit instead of three.

Tuesday, January 21, 2014

APPLE SNACKING CAKE

This old fashioned, super moist, snack cake is quick, easy and only takes ONE apple!! It is the PERFECT snacking cake and goes wonderfully in a lunch box.


1/3 cup brown sugar lightly packed
1 teaspoon ground cinnamon
2/3 cup white sugar
1/2 cup butter (room temperature)
2 eggs
1  1/2 teaspoons vanilla extract
1  1/2 cups flour
1  3/4 teaspoons baking powder
1/2 cup milk
1 large apple
 
Preheat oven to 350°F and grease and flour a 9"x5" loaf pan.
 
Core and peel the apple then pulse it in the food processor a few times until the pieces are about the size of a green pea.
 
Mix brown sugar and cinnamon together and set aside. 
 
Beat white sugar and butter together until smooth and creamy; beat in eggs, one at a time; add vanilla, flour and baking powder and beat until smooth, then stir in the milk and chopped apples, until the batter is well mixed.
 
Place 1/3 of the batter in the loaf pan and top with 1/3 of the sugar-cinnamon mixture; do that two more times, ending with sugar cinnamon.
 
Bake at 350°F for 30-40 minutes (my electric oven takes 40 minutes) or until toothpick tests clean.
 
Let cake cool in pan for about 10 minutes, then turn it out on a rack to cool.
 
This snacking cake definitely does NOT need any frosting, ENJOY!!


Friday, January 10, 2014

BEST EVER CHOCOLATE CHIP COOKIES

THIS RECIPE MAKES THE BEST CHOCOLATE CHIP COOKIE EVER!!
 
I've been making chocolate chip cookies for 45 years; lets just say I've tried a ba-jillion recipes, but today's recipe beats them all hands down, these cookies ARE THE REAL DEAL !!

Some chocolate chip cookie recipes have great flavor but produce a FLAT/SAGGY cookie that spreads all over the cookie sheet (I hate that). some recipes produce a picture perfect cookie, but they don't have that wonderfully chewy texture and buttery flavor that a good chocolate chip cookie needs. 

Well, I'm here to tell you that today's recipe will give you BOTH a perfectly shaped cookie AND one that tastes FIVE STAR .....THEY ARE
PERFECTION!!


The only word of caution in this recipe is that the cookie dough is THICK. I don't think I'd try it with my hand mixer, but my stand mixer worked great with this recipe.

1  1/2  cups real butter (no substitutions)(room temperature)
1  1/4  cups granulated sugar
1  1/4  cups brown sugar
2       large eggs
1  Tablespoon vanilla
4  1/4  cups all purpose flour(I use bread flour in everything)
1  teaspoon baking powder
1  teaspoon baking soda
1  teaspoon salt
2  cups chocolate chips (I use mini chocolate chips)

In the bowl of your stand mixer, combine the room temperature butter, sugars, eggs and vanilla. Beat until well mixed and smooth.

Mix the flour, baking soda, baking powder and salt together and add it, one cup at a time to the creamed butter-egg mixture. Beat until well mixed then beat in the chocolate chips.

Preheat oven to 375°F and use a UNGREASED cookie sheet. Roll the cookie dough into balls about the size of a small walnut and place on the cookie sheet about 2" apart.


Bake in pre-heated oven for 10 minutes. They will still be pretty soft-ish when they come out of the oven, but that is what you want for a soft chewy cookie. Cool them on a baking screen/rack.

This recipe makes about 5 dozen
perfect cookies
 
NOTE: Don't let the HEAVY (raw) cookie dough freak you out, after they bake, they are very tender, rich, buttery cookies.


I'm NEVER switching chocolate chip cookie
recipes again, THIS ONE is the REAL DEAL !!

Monday, January 6, 2014

LIPTON ONION SOUP MIX CLONE

How many times have you set out to put your favorite ingredients into the crockpot, only to realize you do not have Lipton Onion Soup Mix?

Well, this clone recipe is coming to the rescue. It tastes just like boxed Liptons Onion Soup mix (I think it is MUCH better because it has such a FULL flavor). It is quick to make out of pantry staples; it has no soy; it's gluten free; no MSG; you can use low sodium bullion if you want; you can pronounce ALL of the ingredients, and it is VERY BUDGET FRIENDLY!!

I am NEVER buying boxed
Lipton Onion Soup mix again!!

 
This clone recipe is GREAT for dips, pot roast, meat loaf, or anything you would normally use the onion soup mix for.
 
4 tablespoons DRY instant minced onion (toasted)
2 tablespoons LOW SODIUM beef bullion granules
1/4 teaspoon onion powder (not onion salt)
1/4 teaspoon DRY parsley flakes
1/8 teaspoon celery seed CRUSHED (important ingredient)
1/8 teaspoon paprika
1/8 teaspoon black pepper
 
Equals a  single 1 1/4 oz.
envelope of soup mix.
 
NOTES: It is not necessary, but I toast the DRY instant minced onion in a hot DRY pan for a few minutes (watch it closely). When it turns golden, remove from the pan immediately or it will continue to get darker. Toast them so they are this color:
 
 
NOTES: Make sure you crush the celery seed (and don't leave it out). A mortar and pestle work well for this.


NOTES: If you use the GRANULAR TYPE beef bullion (and you are going to make a sour cream type dip) you'll have to mix everything together and let it sit in the fridge for 20 minutes or so........so the bullion granules can dissolve. After 20 minutes, just stir and the granules will disappear.
 
NOTES: This sounds like a LOT of onion, but it is just right!!


Tuesday, December 31, 2013

FIVE MOST POPULAR POSTS OF 2013

We wish you all a very HAPPY and HEALTHY 2014!!
 
The five most popular posts on Coleen's Recipes in 2013 were:


Thank you very much for visiting
my recipe blog this year!!


Friday, December 20, 2013

FIVE STAR CARAMEL CORN

If you are looking for a last minute gift idea that is super easy to make and even more easy to "consume mass quantities" (as the Coneheads would say); you have to try this caramel corn recipe from the cooks over at Table for Seven. I've tried a lot of caramel corn recipes over the years, and this is BY FAR the best one EVER!!  As a matter of fact, picky-picky husband and I ate the entire batch in one evening, we just couldn't leave it alone!!


1 bag of microwave popcorn (see note)
1 cup brown sugar (I used dark brown)
1/4 cup Karo corn syrup (the clear kind)
2 teaspoons molasses
1/2 cup butter cut into cubes
1/4 teaspoon baking soda
1/2 teaspoon salt
1/2 teaspoon vanilla

Preheat your oven to 250° and lightly spray a large baking sheet (with sides) with vegetable spray, set aside.

In a sauce pan, bring the brown sugar, corn syrup, molasses, butter and salt to a simmer. Cook and stir until this mixture reaches 250° on a candy thermometer (it takes about 5 minutes).

While the mixture is simmering, pop the bag of popcorn in the microwave then spread it out on the prepared baking sheet and let it sit in the preheated oven to stay warm.

When the caramel mixture reaches 250°, remove it from the heat and stir in the baking soda and vanilla.  Stir until very well mixed (it will get just a little foamy).

Pour over the popped corn and stir to coat. Bake coated popcorn in the 250° oven for one hour, stirring every 15 minutes or so.

After it has baked one hour, turn it out onto some waxed paper and let it cool (doesn't take long). Once it is completely cool, break apart any larger pieces and store in an airtight container (or Ziploc bag).

NOTE: I used one bag of lightly salted microwave popcorn. Personally, I don't think I would use the heavy butter flavored variety, although I'm sure it would work.

NOTE: Keep a cut of hot water that you can put the candy coated spoons in....makes clean up a lot easier.

NOTE: Make sure the baking sheet that you use has sides. I used my roaster pan and it worked well.  You just want the sides to be tall enough that, when you stir the caramel corn you won't lose any over the edge.

NOTE: Be careful while you are stirring this caramel sauce so you don't get it on your skin (it is dangerously hot). Once you turn the finished caramel corn out onto waxed paper, it cools down very quickly.

NOTE: The final caramel corn is lightly crunchy and not at all sticky as long as you keep it in an airtight container.

Monday, December 16, 2013

SUPER EASY CREAM PUFFS

If you are looking for something super simple, yet impressive enough to WOW your dinner guests over the holidays, I suggest you make these cream puffs.  They are SUPER easy to make, SUPER economical and SUPER fun to serve.


1/2 cup butter (cubed)(no substitutions)
1 cup water


Bring the water and cubed butter to a boil (just until the butter melts). While it's still boiling, add one cup of flour (all at once) and stir with a sturdy spoon until the mixture turns into a thick "glob" (it just takes a few seconds).


Remove from heat and put "the glob" in your stand mixer. Mix on medium speed while you add 1 teaspoon of vanilla and 1 tablespoon of sugar.

 
Mix on high for a couple of minutes or so, just to cool off the dough a little.

With the mixer still running, add four eggs, ONE AT A TIME, beating well in between each egg. The final dough will be quite sticky.

Either grease your cookie sheet or line with parchment paper (I like to use parchment paper) and place spoonfuls of this mixture (about the size of a golf ball?) on the prepared cookie sheet, making sure they are about 3-4 inches apart since, as they bake, they will puff up a lot.

Put in a PRE-HEATED 400°F oven and immediately turn the oven DOWN TO 350°F. Bake for one hour. 

When you take them out of the oven, poke a small hole in the side of the baked cream puff to let steam escape. I have forgotten to poke that hole before and it didn't seem to make a lot of difference. 

Cool completely on a wire rack.


They come out of the oven
LIGHTER THAN AIR!!
 

To serve, cut in half and fill with sweetened whipped cream or berries and whipped cream or pudding, or ice cream or anything your family likes.


Dust the tops with powdered sugar or drizzle with chocolate sauce.

VARIATION: If you leave out the sugar and vanilla, these puffs are delicious filled with chicken salad, seafood salad, etc.


Saturday, December 7, 2013

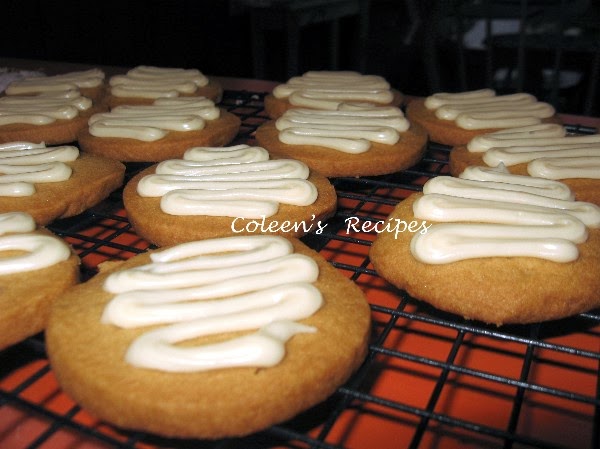
MELT IN YOUR MOUTH SHORTBREAD COOKIES

'Tis the season for Christmas cookies, and this is one of our favorites. Simple ingredients, simple instructions; you can make them as festive (or simple) as you want and they are still "melt in your mouth" delicious. Try these classic shortbread cookies for the holidays.

 
SHORTBREAD COOKIES
 
1 cup room temperature butter (no substitutions)
1/2  cup brown sugar (packed tight into measuring cup)
2 teaspoons vanilla
2 cups flour
 
In a large stand mixer (using paddle beater), beat the butter, vanilla and brown sugar (on high) for five minutes (scrape down the bowl sides half way through).
 
After 5 minutes, add the flour (one cup at a time) and beat until very well mixed and the cookie dough comes away from the sides of
the bowl.
 
Roll the dough into a log and wrap in plastic wrap. Chill for at least a couple hours (I like to chill overnight).
 
When you are ready to bake these cookies, roll the log in sprinkles or finely chopped nuts, pressing them in with your hands just a little.
 
Using a thin bladed knife, slice the cookie log into 1/4" slices and place on an UNGREASED cookie sheet.  Bake in a pre-heated 325° oven for 20-25 minutes or until edges of the cookies JUST START to change color. My electric oven takes 23 minutes.
 
Remove from cookie sheet and cool on bakers rack.  These cookies do NOT spread out when you bake them, so you can really place them close together on the baking sheet.
 
 
SPRINKLES?
 
NO SPRINKLES?
 
Just make sure you have a
tall glass of milk!!


Wednesday, December 4, 2013

BRANDY SNAPS

If you want to impress your holiday guests, make some of these Brandy Snaps for them. They look so elegant and they are definitely not something you see on every holiday table.

A hard candy shell filled with sweetened whipped cream...do I have your attention yet?  Pretty fool proof if you follow my extra tips below printed in RED, AND you can make them days in advance and fill them just before your guests arrive. 


BRANDY SNAPS


Brandy Snaps are basically a crisp, sweet, lacy, candy shell that you can fill with sweetened whipped cream or your favorite mousse.

They look very hard to make, but it is an illusion; they are pretty easy if you pay attention to the tips below in RED.

2 tablespoons sugar
2 tablespoons white corn syrup
1/4 cup butter  (I used only 3 tablespoons)
2 teaspoons brandy (or) 1 teaspoon vanilla (I used rum extract)
1/4 cup all purpose flour

Since this whole process goes VERY fast, it is best to have everything ready before you start cooking the above ingredients.

Preheat your oven to 350° and line a cookie sheet with parchment paper (important). These candy shells REALLY spread as they cook, so only plan on making six of them on each cookie sheet.

Mix the sugar, corn syrup and butter in a small saucepan. STIR over medium heat until the mixture is good and bubbling, then remove from heat and stir in the flour and flavoring.

Drop one measuring teaspoon (per candy shell) of the cooked mixture onto the parchment paper. This will spread out into a circle about 4" in diameter as it bakes for about 6 to 7 minutes, but watch them very carefully after six minutes, as they can go from caramel colored to DARK very fast. It sounds tricky, but it isn't.

My candy circles were fairly pale in color until they hit the 6 minute mark in my electric oven, but they were a beautiful light caramel color at 6 1/2 minutes.

When they have turned a nice light caramel color, remove from the oven and let them sit on the cookie sheet for about 30 seconds. If they look a little oily, LIGHTLY dab them with a paper towel.

Use a pointed knife and lift the edge of the candy circle up a little so that you can grab it with your fingers (be careful, this is VERY  hot). One at a time, quickly roll the candy circle around the handle of a wooden spoon (they will cool almost immediately and hold their shape).

Once you form it around the spoon handle, it will instantly be cool enough to slide the candy tube off of the handle, and it's done!! 

If the other candies get too "hard" to roll, put them back in the oven for 30 seconds or so (but that shouldn't be a problem, as they stay fairly pliable as long as they are on the hot cookie sheet), they only become rigid once they cool off.


I didn't use a spoon handle, I used some metal cannoli tubes I have and they worked perfectly (no need to grease the spoon handle).

Keep the cooled candy tubes in an air tight container until you are ready to serve them. Fill them with sweetened whipped cream (the candy tubes can be filled up to about an hour before serving).

Don't be scared off by any of my "warnings' about this recipe, it may sound complicated, but it really is pretty easy and I hope you try it.

NOTE: I substituted rum extract for the vanilla, the candy tasted like butterscotch. I think ANY extract would work.

NOTE: You don't have to fill these with whipped cream. Almost any mousse like whipped filling would work wonderfully.


Friday, November 29, 2013

BACON EGG and CHEESE TOAST CUPS

This is a very EASY recipe because most of it can be made ahead of time.  It is a FUN breakfast to serve company or a bunch of rowdy teenagers or a breakfast buffet crowd because it can be finished off last minute!!


There are no real measurements for this recipe; just one circle of toast, a pinch of cheese, one egg and one slice of precooked bacon for each serving (use the regular thickness bacon  because thick bacon won't work for this recipe).

These little beauties are quite filling and two of them make a hearty breakfast.

The "do ahead part" is to spray the cupcake pan generously with vegetable spray, then put a "toast circle" (un-buttered) in the bottom of each cupcake well.

Next, pre-fry the bacon. I do mine in the oven (the day ahead) because it comes out perfectly flat and easy to work with.  Click HERE for my post on cooking bacon in the oven.

Bake the bacon at 375 (no need to preheat) for about 20 minutes, or if you are frying it, cook it about 2/3 done (you want it almost done, but still pliable).  Drain the bacon but don't let it cool down much (it tends to get stiff as it cools down). Quickly wrap each cupcake well, like this:

Add a healthy pinch of shredded cheddar ( I also like pepper jack cheese) on top of the toast, like this:

At this point, you can put them in the fridge and bring them out the next morning.

When it's time to eat, preheat your oven to 400 and carefully break an egg into each "nest"

Sprinkle with kosher salt and coarsely ground pepper. Put them into the oven for for 15-18 minutes or until the eggs are done to your liking. Let the finished eggs sit in the pan for a minute or two (don't worry, they stay very hot).

Scoop the baked egg cups out of the pan with a spoon (they come out easily). If you like your eggs done fairly well (like we do), you can pick these up and eat them out of hand, but if you like a soft set egg, you'll need a plate and fork.


I am definitely making these for Christmas morning,
along with fruit cups
and cinnamon rolls!!